GaoFighGar
GaoFighGar is one of the mecha that appears in GaoGaiGar Final – if all of those words seem like gobbledygook, I don’t know what to tell you. You can read all about the character here.
Bandai released GaoFighGar in their Super Mini-Pla line in 2018. The box consists of four mini kits that combine to form the robot.
Super Mini-Pla GaoFighGar is available at HobbyLink Japan
Each box took me about an hour to assemble. The instructions are pretty simple, and each kit has its own set of instructions and sticker sheet. Parts are molded in color, and small parts, such as the faceplate, come pre-painted.
Watch the review to get an idea of assembly.
If you can follow basic instructions, you can assemble this. No glue is needed, but there are a few parts that could benefit from it.
There are four main components to GaoFighGar:
– Phantom Gao
– Stealth Gao III
– Liner Gao II
– Drill Gao II

Phantom Gao
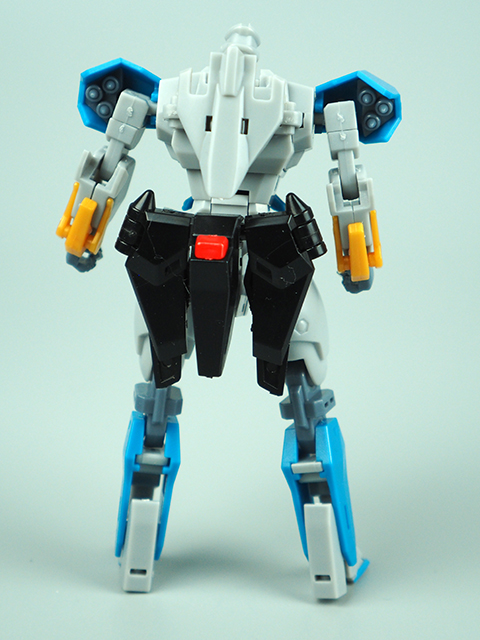
Phantom Gao forms the core of GaoFighGar. It’s a large, humanoid robot that transforms into a spaceship, sort of. It’s basically just the robot crunched together. I’m not even sure I’ve transformed it right. It’s hard to know when the result is unrecognizable anyway.


Robot mode fares better, and is a fully poseable action figure about 4″ tall. The wings get removed for transformation, never to be seen again. You also have to add fists but otherwise it’s good to go. Pay attention to the upper thighs when posing, they have a tendency to split. Some glue would be helpful here.

That middle blue chest piece pops out all the time – better glue that too.


Stealth Gao III
This big stealth bomber becomes the wings of GaoGaiGar, as well as the head and forearms. It’s a pretty simple vehicle though, and inespecially this mode it really doesn’t do anything.


Liner Gao II
Liner Gao II forms the shoulders and upper arms. There’s a fair amount of sticker application on this one, especially on the missiles. The two halves of the nosecone don’t connect in any way, and the little fins get out of place easily. I do like the jet nozzle section though.


I didn’t realize I didn’t trim the sprue marks until I shot the photos. Best to have a hobby knife handy to trim those up.

Drill Gao II
Drill Gao II will form the lower legs, and is the simplest build of all the kits. The treads do not roll and it’s pretty simple in the design.


GaoFighGar
The combination is the weakest part of this whole thing. It’s not bad by any means, and considering the size, it’s kind of a miracle. It takes some patience and some acceptance that things will fall apart. Just recite the mantra “It’s not a toy….”
To transform, start with Phantom Gao. You’ve got to have the legs a certain way for them to click into the feet, and it’s hard to remember what way is correct. The arms fold around to the back revealing the channel for Liner Gao to enter, but don’t forget to add the black connector piece to later connect Stealth Gao.
Separate the halves of Drill Gao, and open the front to accept the legs. Remember to pull out the treads, as these push in to lock once Phantom Gao’s legs are inserted.
Liner Gao is kind of a nightmare. The instructions say to remove the panel under one end that the little fins attach to, and also the larger sections near the middle, and you are supposed to thread the whole thing through. Forget that – just separate Liner Gao into the three sections, and only focus on getting the center portion into Phantom Gao. This part SUCKS, and requires some force. Once this is in you can re-attach the Liner Gao parts and pull the upper arm sections down.
Stealth Gao unfolds all it’s underside bits and attaches to that previously mentioned connector. The large head sits over the small head like a helmet while still attached to Stealth Gao. the small side arms connect via pegs onto the side of the figure.
The engines of Stealth Gao become the forearms – Slide the tabs up to pop out the covers and reveal the fists, and then attach to the arms.
The side wing parts can be swapped with translucent parts.
What you have now is a cool looking GaoFighGar and a whole mess of parts.

The core figure, once assembled, is great. The articulation is spectacular. Because it’s so light, I even got it to balance on one leg.


You can swap out the small hands with larger fists, or open hands.


You can replicate the “Heaven and Hell” attack with the shoulder extenders and connected hands. Insert the connectors between the body and shoulders, and then attach the combined hands in front. It’s a bit difficult to get both hands connected at once, but you can get it.


Finally, a Dividing Driver is included. it slips over the left hand, and tabs in the slot where the hand tabs have moved forward. The only thing I don’t like about this is that the blade covered by silver stickers. With all the advanced color molding technology they use, why could this not be cast in chrome?


Conclusion
While there were a few frustrating parts with the combination, the overall result is pretty cool, and at under $40 USD, you can’t beat the price. I had a lot of fun putting it together and it was a good way to spend an afternoon.
You can get your Super Mini-Pla GaoFighGar at HobbyLink Japan